Purchasing Using Vendor Contracts
Note
Review Creating and Managing Vendor Contracts for detail on this topic.
There are two methods to purchase into Lots in HomeBuilder (allocate costs into Lots).
- Vendor Contracts using Construction Items.
- You purchase only items at prices that were pre-agreed.
- This uses Construction Items (pre-setup in the Lot Planning Lines).
- Ad-Hoc Purchasing.
- Cost Detail Codes to automate bringing in the correct GL and setup.
- Purchase any Construction Items against the Lot.
- This method is explained in the article Ad-Hoc Purchasing.
Vendor Contracts using Construction Items
Search Purchase Invoices and create a new Purchase Invoice (standard BC functionality) and then on the Purchase Invoice Page:
- Click on the Actions button and then on the Button “Populate from Planning Lines”.
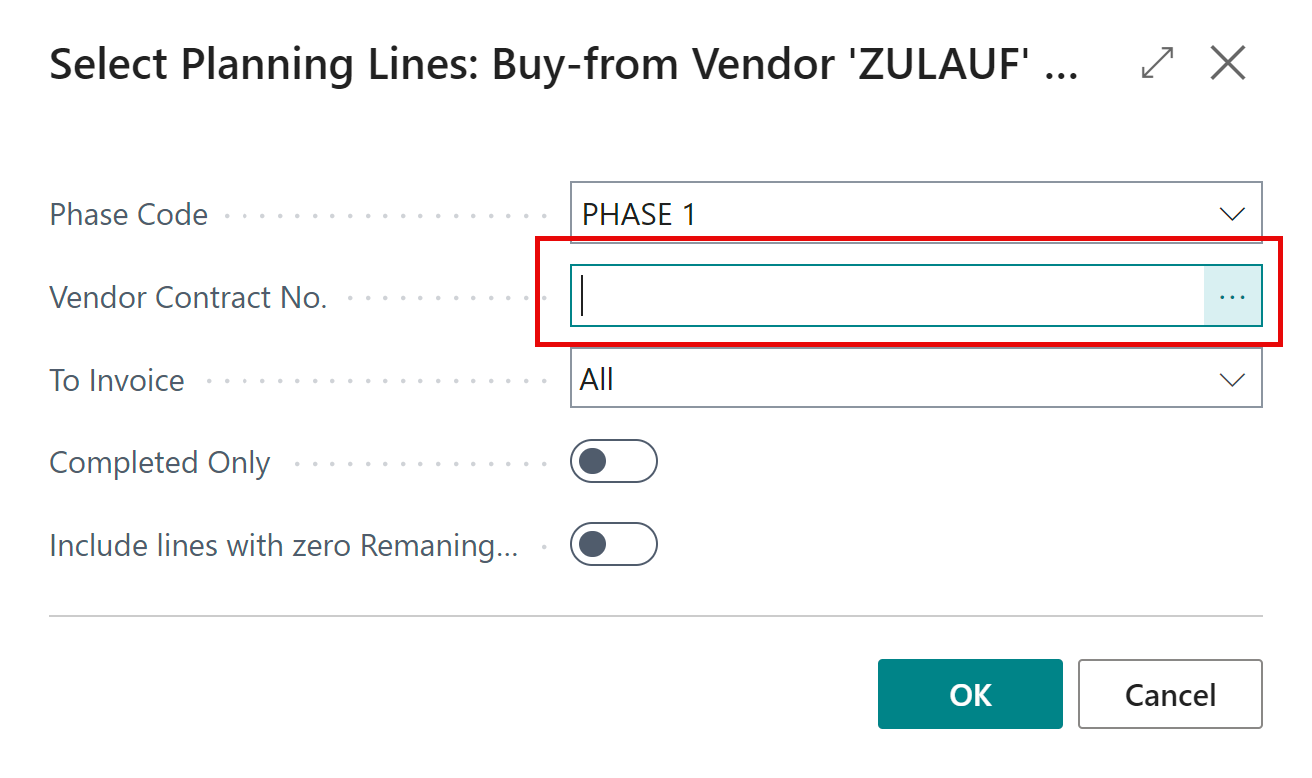
- Enter the Phase and Contract No. and click OK to open the page below, select the lines you want to bring in, and click on “Add Selected to Purchase Lines”.
- Note: additional options only come into play if you are using the scheduling options.

Note
If you do not see a Vendor Contract No. when you drill up on the field circled above, then you have two options:
- Create a Vendor Contract + Revision and add Items to the Contract.
- Ad-hoc purchasing.
- Back on the Purchase Invoice you will see the lines that came in. Repeat the previous process as often as you like to bring in new lines.
- Update the Direct Unit Cost Excl. Tax to match the vendor invoice
- Decrease with no problem.
- To increase you must either add a new Planning Line or adjust the Total Cost of the existing line.
- Post the invoice when you are ready.
“Vendor Contract” Concepts and Suggested Setups
Vendor Contracts are usually created when you have a pre-agreed price to complete a specific piece of work.
- It is not necessary to have a price and there is still value in creating a Vendor Contract just to indicate which vendor will work on the specific item.
- Although not necessary; you may find it useful to have one series of Vendor Contracts for Base Contract Items and a different series for Upgrades and Extras.
- You access Vendor Contracts through:
- Phases (Search: Phases).
- You can see the Vendor Contract No. in:
- Model Items.
- Phase Items.
- Phase Planning Lines.
- Lot Planning lines.
- You should have a “default” Vendor Contract on a Phase Item.
- This default Vendor Contract is to be the default for ALL the models in this Phase.
- This default is copied to the Lot (Planning Lines) when you either:
- Site the Model on the Lot OR
- Release the Lot Selection Package.
- Note that any Item e.g., Hardwood Floor may belong to multiple Vendor Contracts however you may still only have one default against a specific Phase.
TroubleShooting
I Cannot Process (Post) a simple Purchase Invoice – I want to Just Make it Work for all Lots in this Phase –
This error relates to the Budget.
Solution: you must mass update Budgets for all the Lots.
- Search Lots, then select all the Lots (e.g., in a complete Phase) to which you may wish to post purchases.
- Afterwards, select Actions, then Add Budget Revision.

- The next step: from the Cost Details page, select all and click on “Push to Lots” as shown below. When the next screen appears, choose all Lots (e.g., in a complete Phase) and click on the “Push to Lots” button.

Change to Setup Part Way Through: I Added New House Areas to my Model and/or Item
Solution: update any information not under Construction.
Search House Areas, then Create the House Area in page House Areas.
- Not mandatory: add the House Area Measurement to the sub-table.
Search Models, then select Model Items. From Model Items find the Items that you want to update:
- Click on “Applicable House Areas”
- Add the House Area.
- Back on the Model Items Click on the Add Items button.
- Select the Item and Click OK.
Change the Vendor Contract mid-way through a project
Example: "I’m Changing Vendor".
If you have already started work on Lots and need to change the Vendor Contract do as follows:
- Search Phases, then select Planning lines Action Button.
- Select The Planning Lines that you want to assign a new Vendor, then click Assign Vendor Contract Action Button.
- On the following screen you will be able to select a Vendor and a contract for the selected Planning Lines.
