Inspections Setup Requirements
Note
This article is very technical and explains the required HomeBuilder setup and the interplay between the system tables. The addresses are:
- Technically inclined people in your organization.
- HomeBuilder Consultants or Partners.
If your Role is performing Inspections, you should read respectively:
- After-Sales and Warranty - This article provides an overview of the Inspections, Service Issues and Warranty functionality in the HomeBuilder System.
- Performing an Inspection - This article is a step-by-step explanation of the inspection process and contains an instructional video.
Inspections – An Overview and Summarized Process Flow:
- Although there are many options in and routes through the inspection system, your primary objective is to create Service Issues for any deficiencies and indicate no issue for all checks that passed inspection. From these Service Issues you can automatically create Work Orders for the trade or just process the Service Issue through the system.
- Conceptually inspections are split into two types:
- Pre-determined checklist of objects that must be inspected, e.g. Windows, paint, etc.
- Inspections that don't require a pre-determined checklist, e.g. 30-Day Inspections or ad-hoc style such as customer call.
- Service Issues can be created by starting from an Inspection or directly in a Service Issue:
- Start with an inspection:
- From the Lot, create a new inspection and pick an appropriate Inspection Type:
- Populate a list of pre-determined Checklist Items (if the Inspection Type is setup that way). There are two ways to proceed from the Checklist style of Inspection.
- Work through the Checklist and indicate as deficiencies those tasks that have issues – if setup in Inspection Types, the system will automatically create a Service Issue, complete the Service Issue as explained below.
- Directly create Service Issues when you find an issue; the system will link the Service Issue you create with the Checklist so that you can see all the checklist items that have deficiencies vs. those that passed the inspection.
- See below the way to fill in a Service Issue.
- Directly in a Service Issue:
- Open the Service Issues. List and create a new one (if not already done).
- Pick the Phase and Lot (auto-picked if you start in a previous Service Issue card).
- Pick the House Area and Checklist Item (you can see which House Areas have no Checklist Items on the House Area page, you must add Checklist Items to any House Area that you wish to use).
- The assessment must be Deficiency to create a Service Issue.
- Pick a Deficiency Code (you can see which Checklist Items have no Deficiency Types on the Checklist Items page, you must add Deficiency Types to any Checklist Item that you wish to use).
- Add notes and a vendor if you do not see one and wish to create a Work Order.
- Open the Service Issues. List and create a new one (if not already done).
- Notes:
- The vendor comes from the Phase Item but the link to the Warranty Item is created in advance by linking it on the Deficiency Types page. It is common to re-use the same Warranty Item on many Deficiency Types.
- The only reasons we have a Warranty Item are to store a preferred vendor and to create the Planning Line on the Lot.
- An Inspection is automatically created upon creation of the Service Issue (only relevant if the Service Issue was created as a stand-alone document).
Visualization of Data
- In this document we are just covering the setup required to create an inspection (not how to create the inspection itself).
- We create a House Area and Inspectors as part of the setup however both setups only come into play during the actual inspection process.
- The Phase Item (link to Vendor Contract) is only required when we have setup a Phase and need to setup the correct vendors for that specific phase.
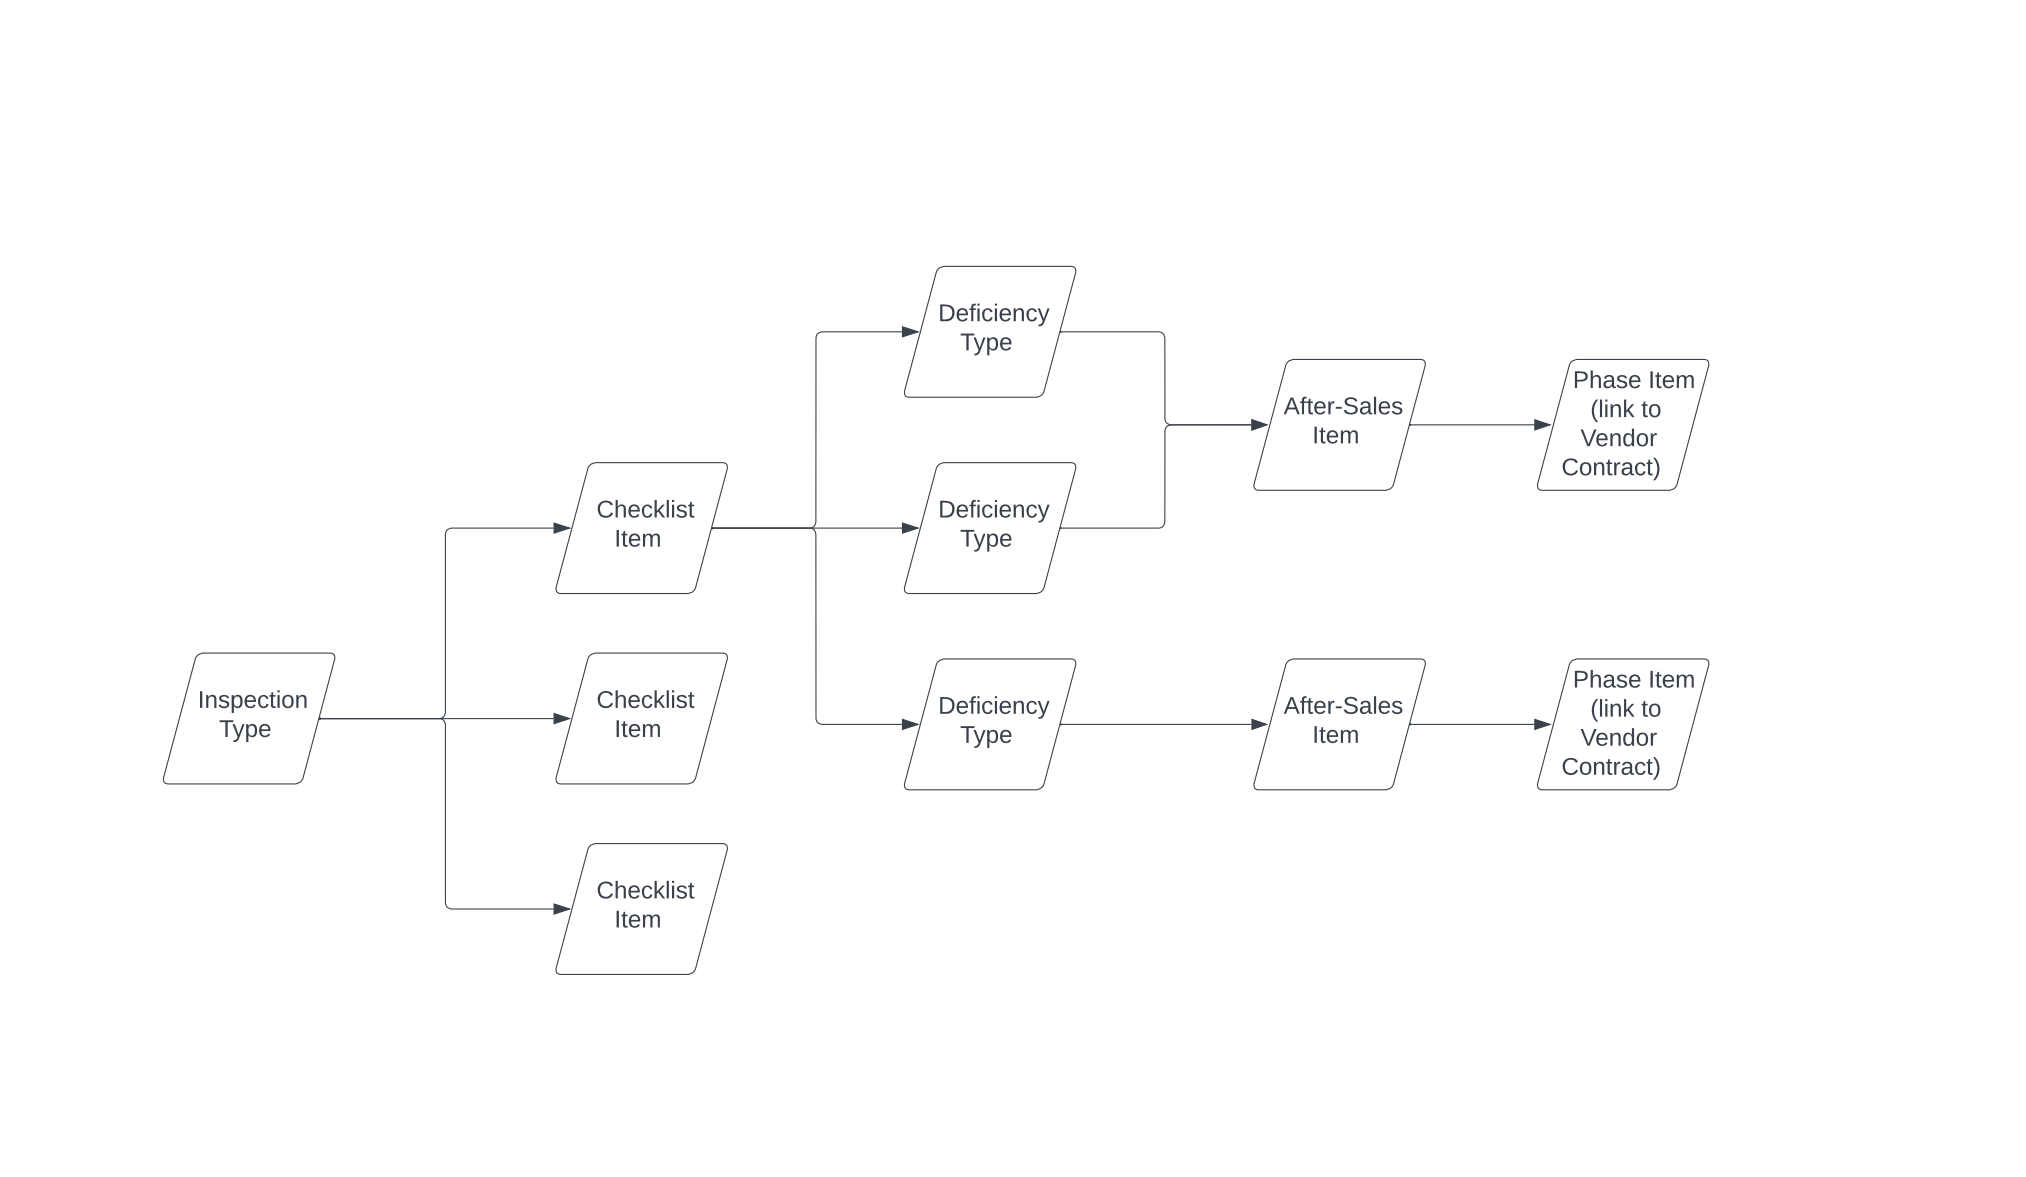
Build The Detailed Data
- The most efficient way to build the data is in reverse order and then piece together once you have built the data.
- The reverse order for table creation is as follows, details below.
- Create After-Sales (warranty) Items.
- Create Deficiency Types.
- Create Checklist Items.
- Create House Areas.
- Create Service Inspectors.
- Create the Inspection Types you might want to make this the start of the linking process (next steps in this document).
- Notes on the table creation (if no notes are provided, go to the table and fill in what you see).
- “After-Sales Items”. This is one item per Vendor (trade) that you will want to do the work. You can re-use this item on as many deficiencies as you wish, and you can change the vendor on each phase. For example:
- Duct damage could require one vendor on one phase and another on a different phase, this is one Item.
- If duct damage could be assigned to two trades and be two different pieces of work:
- Create two Items and two deficiencies.
- If the same trade is used on a different deficiency, you can use this same item on the other deficiency.
- Deficiency Types – see examples below and you may wish to add miscellaneous deficiencies as required.

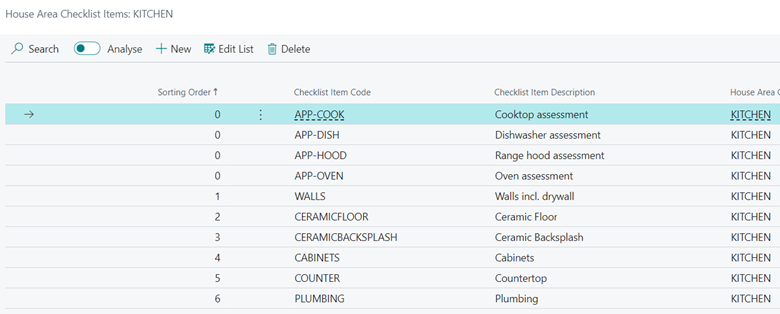
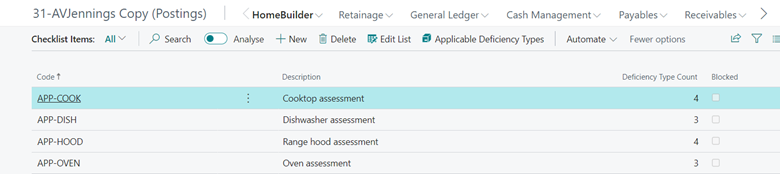
- Checklist items – The example below shows Kitchen Appliances with the Deficiency Type Count shown as a count on each line.

Link the Detailed Tables that you have Created Together.
- After you have the data, you can then link these tables together:
House Area – Checklist Items:
- Add the Checklist Items to the House Area:
- Open the “House Areas” page:
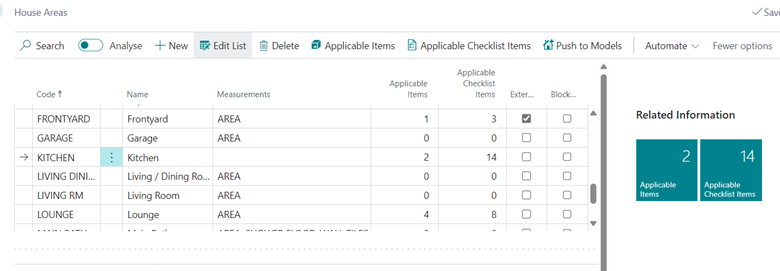
- Click on Applicable Checklist Items and add existing Checklist items using the “+New” button.
- Note that you can re-use Checklist Items, but the Deficiency Types linked to those Checklist Items will be used for all the House Areas to which they are assigned.
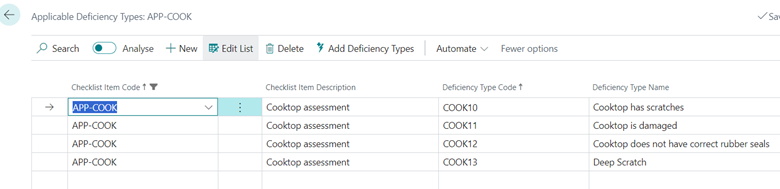
Deficiencies on Checklist Items
- Start on the Checklist Items page.
- Click on the Applicable Deficiency Types button from the Page above. Click on “+New” to enter the (already created) Deficiency Types.
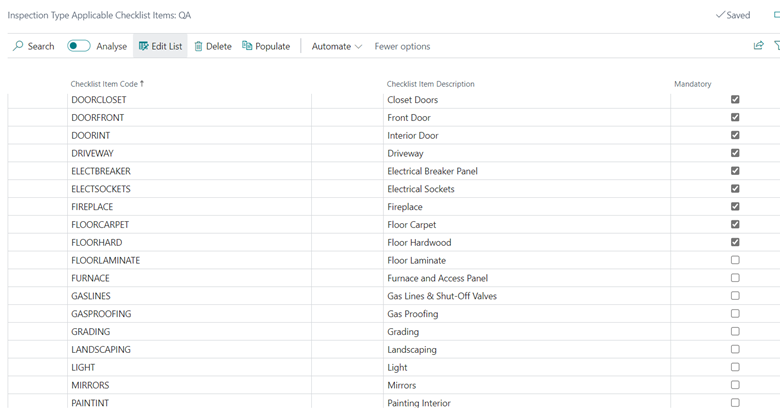
Add Checklist Items to Inspection Types
- Open the page “Inspection Types” and setup a new Inspection Type with the options that you want e.g. “Requires Checklist Entries”:

- Click on the “Checklist Items” button to open the Inspection Type Applicable Checklist Items list (i.e., the Checklist Items for this Inspection Type).
- Click on the “Populate” button to bring in all the Checklist Items.
- Delete the ones that you do not want.
- Mandatory functionality:
- Check on “Mandatory” for all the Checklist Items that are to be automatically brought onto the Inspection Type.
- Do not check on Mandatory for any Checklist Item that you are:
- Allowed to Use
- Will not be brought on the Inspection Automatically.
- Remove any item that is not allowed to be included in this Inspection.
- If you do not add any Checklist Items to an Inspection Type, the inspection with this type will just not allow checklists, you will have to go directly to Service Issues.