Managing Model Items, Budgets, VC (Vendor Contracts), and Lot Planning Lines. Practical Hands-On Examples.
The article here is a practical example of how HomeBuilder mechanics can be applied when managing company operations. It describes the preferred way of working with the most common real-life situations.
In this scenario, we will start with a new Phase created in the existing company. That Phase does not have any Models, Lots, Phase Items, or Model Items. Search Phases, click New, and complete the process of creating the Phase.
First, the Creation of a Model and a Lot in the New Phase.
Search Models, and hit New to Create an empty Model. On the new Model Card, select copy from another Model in the Actions Menu and follow the prompts. Do not copy Model Items.
Important
Copy Model House Areas and House Area Measurements (otherwise the system will throw errors- no quantity will be determined).
To create a Lot, search Lots, click New, and fill in all information.
Vendor and Contract Management
Search Vendor Contracts and click New. The Contract Number must be unique and is for your reference, it should explain the nature of the Contract briefly. In the Description field, you can be a bit more elaborate.
Now click Current Prices to open the Contract Revision Items page. There, from the Actions Menu, select Import Phase Items.
- If there are no Phase Items to import from, you must create them first. It will be explained later in the article how to create Phase Items.
- Once the Vendor Contract is created, search Construction Items and Assign the Vendor and Contract to the proper Construction Item (even if no prices can be updated).
- If there are more Vendor Contracts, (even without knowing the price, just the Vendor), create them now and assign them to Base Contract Items.
Managing Vendor Contracts at a Later Stage of the Phase Development
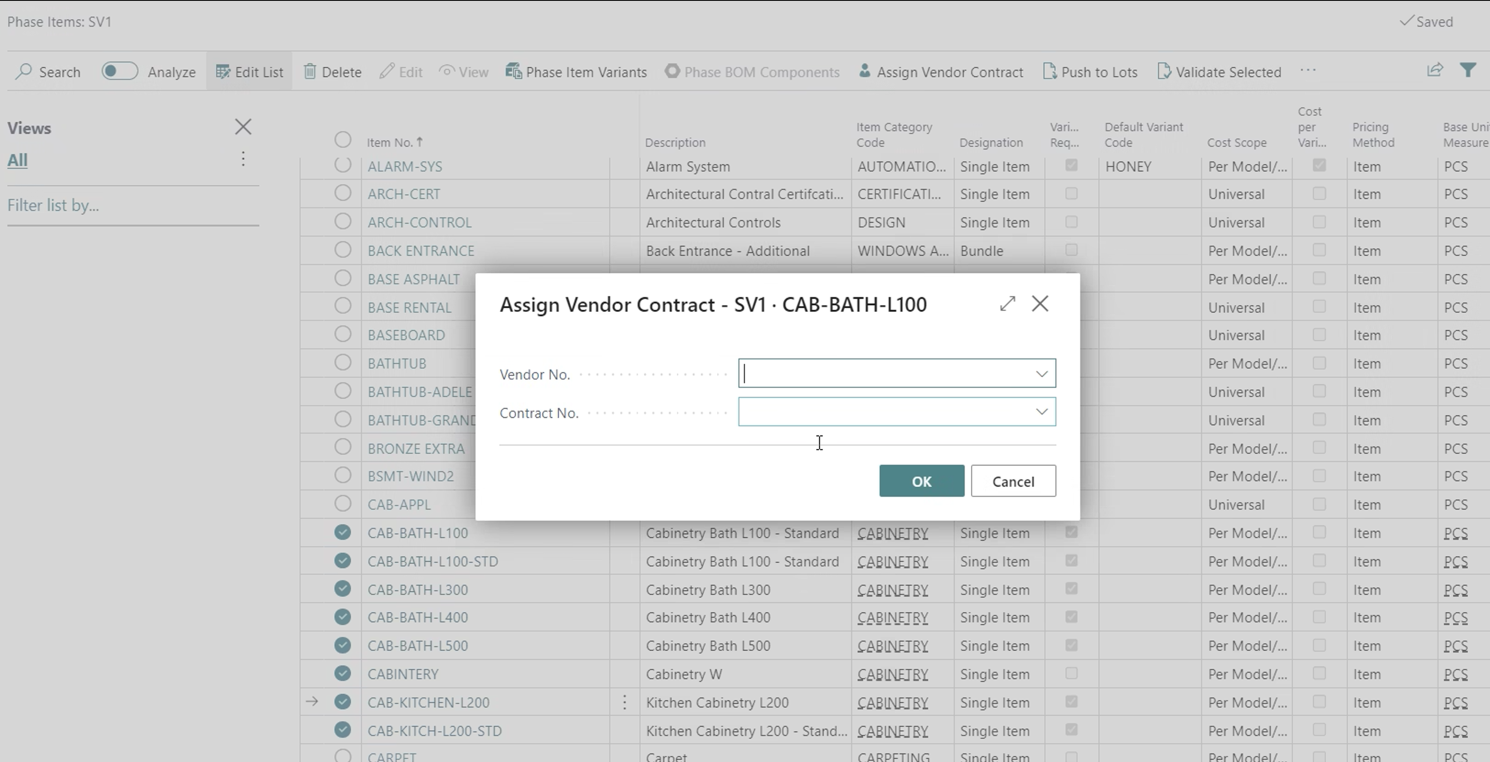
Once you have assigned Vendors to Construction Items, you can move to assigning a Vendor Contract to the Phase Items. This will be on the Phase Level., i.e. each Phase might have a different Vendor Contract. This action will assign the same Vendor and Vendor Contract to all Models in that Phase.
Going More Granular: Changing Vendors on Planning Lines
Example: you have 3 vendors for excavation. Therefore, you assign 1 by default on the Base Contract Item (or the Phase Item), but when you are actually using vendor 2 or 3 on some Lots in that Phase:
Way 1:
When you site the Model on the Lot, go to a Lot Planning Line and change the Vendor assigned.
Way 2:
Search Phases and click on (Phase) Planning Lines. On the Planning Lines Page select all Planning Lines for the Vendor and reassign than Vendor at once for all (Phase) Planning Lines.
- Way 2 is faster when dealing with large Phases.

Price Management
Note
You must adjust prices per Model if the Construction Item Price Scope is Per Model.
It is best to manage prices from the Vendor Contract. (Search Vendor Contracts, and select the Current Prices button to arrive at the Contract Revision Items page).
- Changing prices on the Vendor Contract will adjust the Prices on the Model-level automatically. However, when the Model is sited on the Lot, any price adjustment must be done by additionally pressing the Push Costs to Lots. (this is a deliberate system price control measure.)


In other words: When the Price is changed on the Vendor Contract, it is automatically propagated to the Model Item Price. So Vendor Contract centrally propagates price changes to the Models
Note
If you created multiple new Vendor Contracts, consider unassigning the Model from the Lot, then re-assign. Budget lines will be populated with the newly updated Vendor Contract numbers.
The Model Budget
The Model Budget is created after Construction Items are pushed to the Model. However, it is based on Cost Details on that Model, e.g., if you have 150 Construction Items and 250 Cost Details and push all to the Model, the Model budget will have 250 lines.
To access, search Models, select a Model and click the Budgets Cue. You can adjust the Model Budget here.
Once the Model is assigned to the Lot, the Lot Budget will have (in our example: 250) lines inherited from the Model Budget (Cost Details). The Model Budget Unit Cost will become:
- The Planned Cost Amount
- Budget Amount
and
- Amount to Complete on the Lot Budget.
However, once the Model is sited on the Lot, there will be (in our example 150) Planning Lines created based on the Model Items of that Model. The original Model Budget Unit Cost will become on the Planning Line:
- A Unit Cost.
- Will be part of Total Cost (Unit Cost x Quantity).
- Will show as the remaining Total Cost.
Model Item Management
The purpose of the Model Items:
- To define what Base Contract Items apply to a particular Model. (90% intersect for most of our Clients)
- Pricing: Determine the Cost Scope:
- Universal (same on all models).
Or
- Per Model.
Note
Once the Construction Items are pushed to Models and you want to have a different Cost Sope on the Item:
- you must create another Construction Item with a different Cost Scope. Or
- Delete the Model Item from all Models, adjust the Construction Item Cost Scope, and push it again to Models.
Creating Model Items
Way 1
- Search Base Contract Items, select applicable Base Contract Items, select Push to Models, select applicable Models, then click Push Items to Models.
- Construction Items will become available as Model and Phase Items (Phase Items are created behind the scenes). This is the best way to add Phase Items (one reason is that you will not be able to add a Phase Item to the Model if this item is not present as a Model Item).
Way 2 - Search Phase, select Actions, and click Add Items. Way 3 (Recommended) Add all Items to the Model. To achieve this, from the Construction Items (All Items Cue) page, select all Items you require. Often it will be all or most Items. Afterward, click Pusch to Models Action Button and select the Modeld you want these Items to be created in. Model Items will be created automatically.
Note
Once Construction Items become Model Items, set Unit Costs on these Model Items. They will create “Model Item Amount” which will CREATE A PLANNING LINE with that Unit Cost once the model is sited.
- Each Model Item, even if unit costs =0 will create 1 planning line =$0.
- If an additional Planning line is required, add it. Remember that a Model Item for that is needed.
- You can create multiple copies of Model Items resulting in multiple additional Planning Lines.
Planning Line Creation
There are 3 basic ways to create Planning Lines:
- Through Model Items:
- Ensure the Construction Workflows with Tasks associated with Construction Items (Model Items) for that Model are pushed to the Model- best. (Alternatively, push WF to the Lot)
- When a Model Item is a Base Contract Item (rather than a Color Chart): it will create Planning Lines once the Model is sited on the Lot.
- Model should have Model Items containing Unit Costs. Even a Unit Cost of $0 will create a Planning line but it will be less useful.
- Adjust the price manually on the Lot Planning line level when needed.
- On the Lot Planning Lines, observe how Model Items with Contracts associated with them populated Units Costs. (also with Model Items containing Unit Costs but no contracts)
- By releasing Lot Selection Packages:
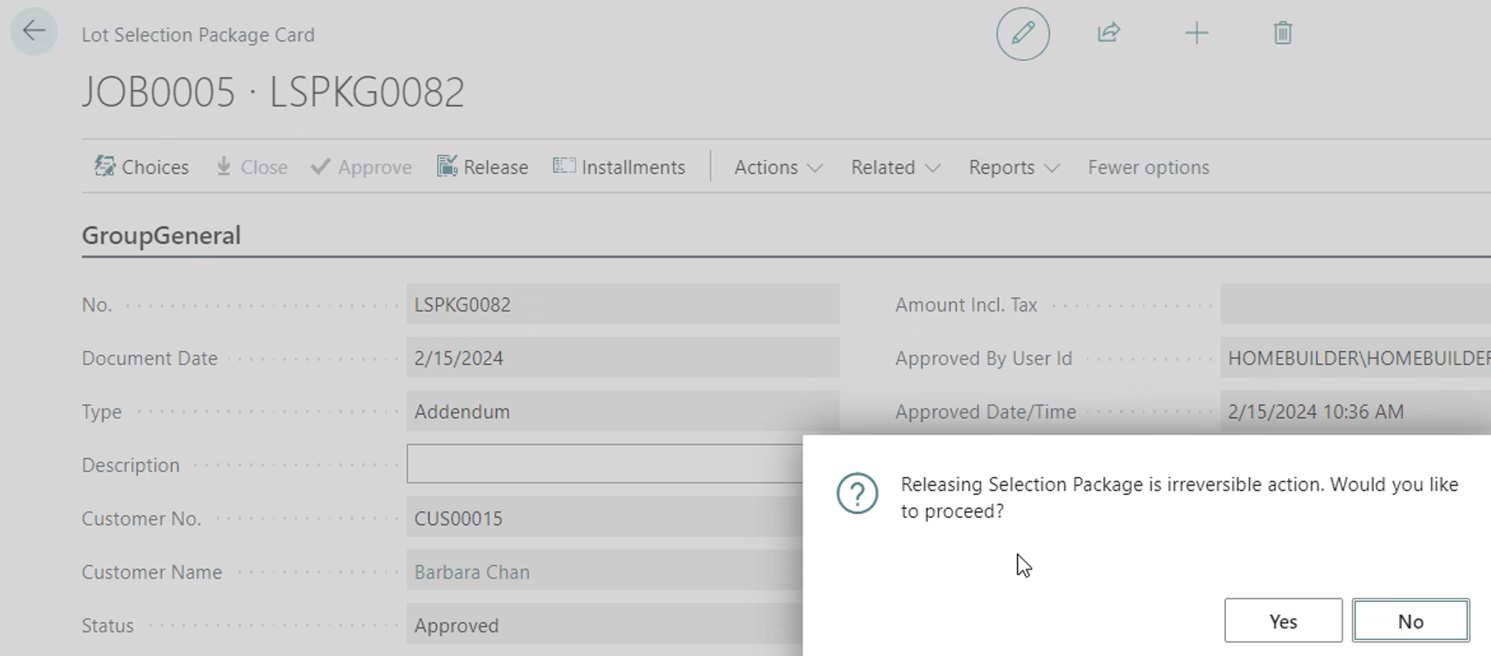
- Only Color Chart Items are applicable here. They can/ should be pushed as well to become Model Items. However, a Planning Line will not be created upon siting. Instead, the Releasing Selection Package process will be necessary.

- Once the Lot Selection Package is released, Planning Lines are created for that Package.
- Ad Hoc Planning Line Creation: On the Lot, select Planning Lines. On the Lot Planning Lines page, click +Add. This will enable you to select 1 Planning Line at a time from the Model Items.
Construction Workflow Templates and Construction Tasks
Important: The Business Central Project (formerly Job) Planning line must have a Task. Business Central Job is a HomeBuilder Lot.
- The business process is as follows: define tasks, then define Project (Lot) planning lines for carrying out and completing that task. A Collection of performed Tasks completes a Project (House Construction on the Lot).
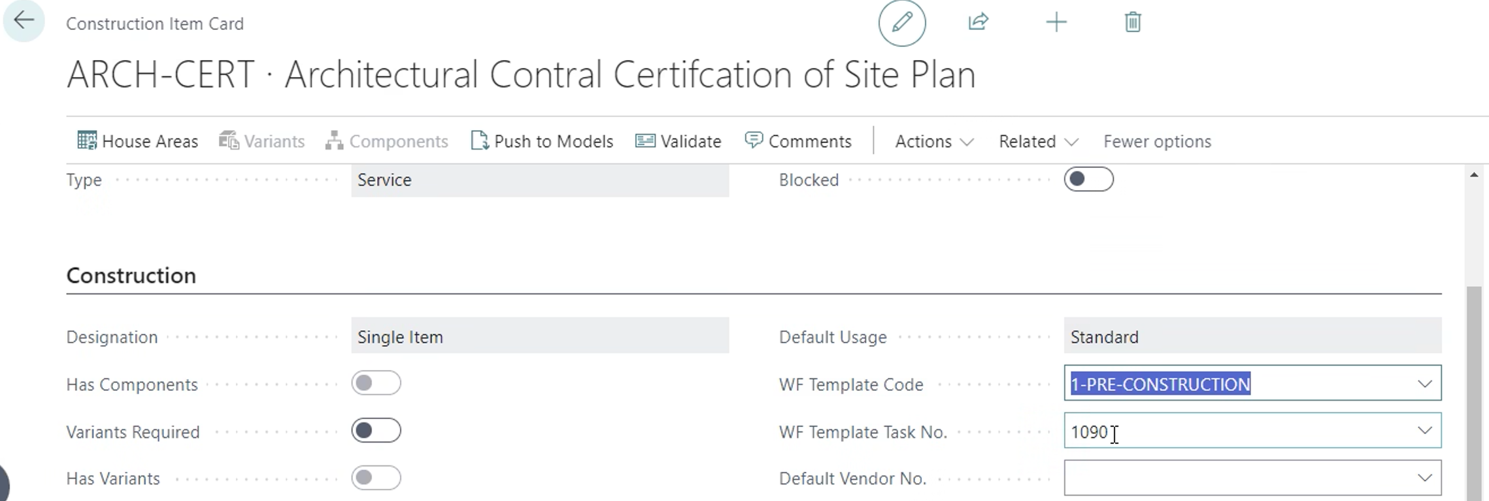
HomeBuilder Workflow Template Tasks have Predecessors, which create an actual workflow (a sequence of Tasks rather than a “container” with Tasks). Therefore, we can have scheduling. Each Construction Item should have a Construction Workflow Template (CWT) Code assigned as well as a CWT Task Number.

On the Construction Workflow Templates page, note the Push to Lots and Push to Models buttons. By default, these workflows should be added and potentially modified on the Model level rather than Lot (to cut your admin time as they will be applied whenever you use, i.e. assign and site your Model)
This is why now you can:
- Push WF Templates (this will push WF Tasks as well) to the Models. A Model will bring in WF to the Lot anyway.
- The process might take a couple of minutes.
- If the Model was already assigned to the Lot, remove the Model and reassign it to the Lot to bring in WF changes from the Model to the Lot.
- To verify, on the Model Card: select Related, click Applicable Workflows, and review the Construction Workflows assigned to that Model.

Creating a Budget
Important
Once all Vendors Contracts are complete and assigned to the Model Items, you should put REMAINING Unit Costs on the Phase Item level or Model Item level before siting. Those will be costs that you want to estimate/budget but do not know the Vendor who will be performing activities specified in the Planning Line.
Once all the above steps have been completed:
- Assign a Model to the Lot (to assign a Model to the Lot, on the Lot Card, Choose Model Code).
- Assigning a Model to the Lot will bring Model Budget Lines (price list) and the Construction Workflow to the Lot.
- It will also bring House Areas and House Area Measurement.
Notes
Adjusting Unit Costs
Way 1
Adjust the Unit Cost straight on the Lot Planning line
Way 2
Adjust the Vendor Contract, and push to Lots. (Unit Costs update on Models directly, no need to update.)
Way 3
Adjust the Unit Cost on the Model Budget, then unsite the Model from the Lot, site again. This will update Unit Costs on the Planning Lines as well.
Adding a Planning Line to the Lot
To add manually a Planning Line to the Lot, Open a Lot Card and select Planning Lines. From the Lot Planning Lines click +ADD (not +New). This allows for adding the Planning Lines one by one.
Adding Ad-Hoc Costs to the Lot Planning Line
From Construction Workflow Templates, push WF to the Lots (if not present yet). Once Tasks are present on the Lot (only then, as the Lot is the Project in BC) Costs can be booked to the Lot planning Line (Job) using the Purchase Invoice.
Posting Ad-Hoc Costs to the Lot
You can NOT post a Purchase Invoice straight to the Lot without the Construction Workflow Task as you will receive an error. Once you have a Task defined for the Construction Item you are trying to post on the Lot, a Budget Line will be created on the Lot (posting will create 1 Budget Line on that Lot, but not a Planning Line.)
Using HomeBuilder Template Company
This article describes complex HomeBuilder functionality requiring preparatory setup. The brunt the this is completed for you when you are using the Template Company we provide.
Creating Phase Items
The recommended way to create Phase Items is to Create a Template Model and Push all Construction Items to that Model. To achieve this, search Base Contract Items, select all of them from the list, then click Pusch to Models Action Button.
Note
To see the "big picture" interplay between Workflow Tasks, Construction or Selection Packages/Color Charts, Models, Planning Lines, and Purchase Invoices, visit Task-Item-Purchase Invoice Linking Help File article. You will find an informative diagram and links to areas you might want to explore in detail.
